Description

This PC is more or less a big upgrade which should last me for the next five years or so. The main goal was to create a visually pleasing build using the stunning Fractal North case and cramping as much water cooling stuff into it as possible to create a quiet system.

The colors used for this build should kinda resemble the landscape and colors found in/around glaciers of Scandinavia, with the walnut wood and gold accents complementing the whole theme.

The PC runs a dual boot setup of Windows and Linux. Where Windows is mainly used for gaming and Pop OS for work (programming).

Parts:

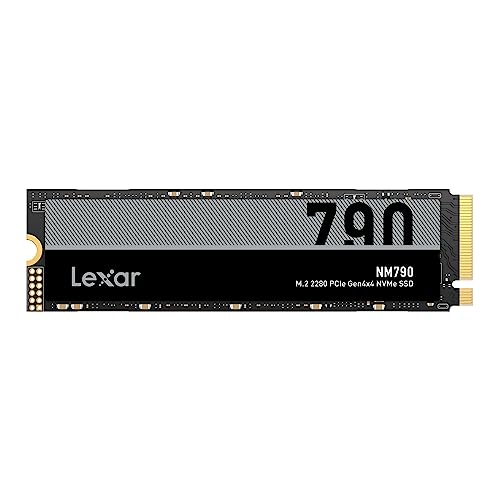
Bought a 14900k due to it being actually less expensive compared to the 13900k at the time I bought it. Originally wanted to go with an RTX 4080, but it didn't seem like a good value for me. If I have to spend 1k+ on a GPU, might as well go with the best. Unfortunately, the Asus card has insane coil whine, which kinda defeats the purpose of having a quiet build. I was stupid and didn't inform myself before buying the card because it seems to be a widespread issue with Asus. The Pro Art Mobo was mainly chosen to match the theme of the build with black and gold accents. Also works great so far and offers all the connectivity I need. RAM sticks also chosen mainly due to the design of the heat spreader which works well in combination with the mobo. The two 4TB Lexar SSDs are pretty good value, and its shortcomings compared to alternatives do not really affect real-world scenarios. For the fans, I've been using Noctua for years. In my opinion the most silent, reliable and performant fans. The front intake uses 25mm ones, while the 240rad and exhaust fans are 15mm to not overlap the mainboard details. Last but not least the Seasonic PSU which I mainly chose due to its compact length that allowed me to have as much space as possible to fit the pump/res combo, cables and rad.

Cooling Loop:

The case underwent various mechanical modifications to fit the various water cooling gear. It took me a lot of time to fully plan the final loop layout to make sure it utilizes the space provided by the North to its fullest. The loop is fully built using EK Quantum parts except for the 240mm rad, where I used a 27mm thick old EK design to avoid overlapping the mainboard heat sinks and have enough space to squeeze a hard tube through. The tubing is frosted corsair tubing which should give the whole thing an icy and cold look paired with slightly blue dyed water it was my goal to represent some kind of glacier water stream. The heart of the loop is of course the beautiful walnut CPU block from EK which is simply a match made in heaven for the North.

The cooling loop is controlled to work almost passively during desktop loads. All Fans are switched off until either CPU or GPU hit 60ยฐC. Only the pump runs at a low speed to keep the liquid flowing. So the system is nearly dead silent in desktop workloads, but naturally also runs hotter compared to other systems. With this setup, temps during Desktop usage are about 55ยฐC (CPU) 48ยฐC (GPU) while gaming around 70ยฐC for both CPU and GPU.

Cabling:

MDPC-X sleeving colors (blackest black, titanium grey, commando green). Always a pleasure to work with MDPC-X sleeving although the 12vhpwr was a bit of a pain to do as it leaves very little room for error. For cable management, Clockwerk Industries (custom manufactured) HPS combs were hard mounted to the back of the case. For cable combs I used Clockwerk Industries contour combs which feature a design I like a lot. The small sleeving and cabling used for the 12vhpwr did not match with the contour combs, so I used a cable sewing technique to create cable combs using sewing thread. Was not sure if it would work and fit the visual appearance of the build, but the sewing actually works very well for keeping the cables in check and looks clean in general.

Other:

Due to now having a lot more raw computing power, it didn't make sense to keep my old 1440p display. So instead grabbed the odyssey ultrawide, which should better utilize the computing capabilities of the PC. The display works great so far and is a significant step-up in nearly all aspects compared to my old display.

Planning and assembling of the build took part within ~1.5 Months in my free time. I'll add more pics with the specific build steps if there is any interest (especially for the mechanical modifications) and once I got time (Done, check the images above).

(All part prices in swiss francs)

Todo: Adding some warm white COB LED strips to tastefully light up the interior

Log in to rate comments or to post a comment.

Comments

TeyKey1
  • 1 year 4 months ago

Hello all, thank you for the kind comments and praise. I got around to finish the picture build log and added it to the images above. So in case you are interested in how it all came together, check out the new images :)

BiggieCheese234
  • 1 year 4 months ago

Iโ€™m seconding this feature ! And this is the best looking pc I have ever seen! +1 and many more if I could

[comment deleted by staff]
jamiw
  • 1 year 4 months ago

iโ€™m fourthing

RegionalCarnage
  • 1 year 3 months ago

I'm fithing!

mrdben52
  • 1 year 3 months ago

im sixthing!

Aspect22
  • 1 year 3 months ago

Iโ€™m seventhing and Iโ€™m keeping the chain alive !!

ThoughtA
  • 1 year 3 months ago

Congratulations, your build has been featured on the front page of the site!

All past featured builds can be viewed here.

therealacp
  • 1 year 4 months ago

CLEANEST PC EVER. Im calling for a feature

Curtis1mo
  • 1 year 4 months ago

You know what, I actually kinda like the whole hidden loop aesthetic.

BiggieCheese234
  • 1 year 3 months ago

How many times can I predict the future

Aspect22
  • 1 year 3 months ago

He is the feature finder foretold by legend.

Sn8keEyez
  • 1 year 4 months ago

The aye have it for a feature. EK makes incredible gear. A++ for effort to make a clean machine.

Antho-le-Z
  • 1 year 4 months ago

Whaouuu oO

gp450
  • 1 year 4 months ago

Masterful. Will easily get featured

Rivalbub
  • 1 year 4 months ago

Too bad about the coil whine. My ASUS ROG card has it too, but I think it's gotten quieter over time. Hopefully it gets quieter for you too.

TeyKey1
  • 1 year 4 months ago

Yes, I also hope this is the case, but we'll see. Only good thing is that it is only audible during gaming, in which case I usually have headphones on :D

jamiw
  • 1 year 4 months ago

this pc is beautiful! mods, feature this!!

jamiw
  • 1 year 3 months ago

lets goo itโ€™s featured

ActivateShaders
  • 1 year 4 months ago

I knew I should've commented on this when nobody else had. How's the monitor?

TeyKey1
  • 1 year 4 months ago

Well, it's a giant step up from my 16:9 1440p monitor. The only thing I don't like is that the plastic back pane makes feint crackling and popping sounds when it heats up/cools down. Kinda annoying when you don't have headphones on honestly. Maybe it will get better with time.

ActivateShaders
  • 1 year 4 months ago

Yeah, my monitor also creaks.

BiggieCheese234
  • 1 year 4 months ago

Hey man if your pcs gonna look like a god tier beast you should fix up the cables in the setup other than that great build

corygang18
  • 1 month ago

the cables are meant to look like that

oDiamondz
  • 1 year 4 months ago

omg putting the pump in the psu chamber is such a good idea! that should be an option out of the box!

TeyKey1
  • 1 year 4 months ago

Yeah, it saves a lot of space, but you can only fit the smallest pump/res combos in there or only a pump, so it's probably not the best position for a majority of builders.

oDiamondz
  • 1 year 4 months ago

true but i still think larger cases should offer that option

baneand
  • 1 year 4 months ago

Hi, what tool did you use to cut a hole for the gpu cable? I want to do some simple cut for the cable doesn't have to be like you did, but looking if I can get a simple pliers for steel cutting or something like that, so that I can increase the hole which is already there to be able to put through my short 12vhpwr cable. Thanks

TeyKey1
  • 1 year 4 months ago

I used a Dremel with an EZ Lock Cut-off Wheel to cut the hole, then used a needle file to get the shape right.

The steel sheet at the position of the hole is about 1.1mm thick. I have just tried cutting an excess 1.1mm thick piece of my case with diagonal pliers and I don't think this will work well. It does not really cut well and you need excessive force to get a cut with such a tool (possibly damaging it in the process). Given there's also not much space to operate with the tool, this will be a difficult feat to achieve. I also tried cutting it with tin snips, but this also does not work well and the tool is probably too big to even properly get it into the existing hole.

If you have a drill with roughly the same size of the existing hole you can drill a hole right next to it and remove the excess material between the two holes with a file. Or alternatively only use a needle file to enlarge the existing hole (might be a bit tedious and require some time but should work well).

baneand
  • 1 year 4 months ago

Thanks for details I will consider my local options for tools for sure!

diniguan
  • 1 year 4 months ago

Clean build! Just the run from GPU to CPU throws me a tad.

Hope this gets featured.

M_Oswald
  • 1 year 3 months ago

That 12VHPWR cable may be a piece of crap design but damn does it make cable managing so much easier. This is clean as hellllll

TeyKey1
  • 1 year 3 months ago

Yeah it definitely does. Before manufacturing my own 12vhpwr I was like it can't be as bad as everyone says. After I was done, I understood why everyone thinks it's a bs design.

oDiamondz
  • 1 year 3 months ago

considering doing a similar build, have you had any issues with 4 sticks of ddr5? were you able to get it to run stable at 6000 Mhz?

TeyKey1
  • 1 year 3 months ago

Haven't had a single issue with those sticks. XMP 6000Mhz worked stable straight out of the box without the need for any further adjustments.

oDiamondz
  • 1 year 3 months ago

oh sick! i have heard alot of stories about ddr5 not working as advertised with 4 sticks but im glad to hear that!

TeyKey1
  • 1 year 3 months ago

Yeah me too. Maybe it also helped that I flashed the most recent bios update prior to the first boot which might have ironed out some issues with older versions.

Glhurst
  • 1 year 3 months ago

Absolutely gorgeous build!

Aspect22
  • 1 year 3 months ago

Nice job on tubing !!
It looks like ice.
:)

TeyKey1
  • 1 year 3 months ago

Thanks. Yes that was the main goal. The frosted tubing helps a lot but I also added a tad of blue dye into the water which makes it look colder as well.

Bluelasercookie
  • 1 year 3 months ago

Lord that is the most clean cable management Iโ€™ve ever seen congrats man

syuusususyr444
  • 1 year 3 months ago

This is genuinely the most awesome looking computer I've seen. Personally, I'm not a fan of the high end builds that are loaded with RGB in the Hyte Y60 (or similar) cases.

bonifacio
  • 1 year 3 months ago

I'm loving this. Color combo is perfection! Did you have to do anything to get the RAM to work or did it just work? Did see it on the QVL. Wanted to just check. I know sometimes people double up on RAM just to fill slots.

TeyKey1
  • 1 year 2 months ago

Worked out of the box for me with xmp. I did flash the newest bios though due to the 14900k so that might have helped.

dechaun
  • 1 year 2 months ago

Hey man, amazing build! Question though, do you have a breakdown of the EKWB parts as in torques and stuff? I have to admit that your case has inspired me to make a similar looking one. Also quite new with custom watercooling loops and custom cables/sleeving. Any tips for a newbie maybe? :)

TeyKey1
  • 1 year 2 months ago

I can't give you an exact count on all the fittings and stuff used. This will depend heavily on how you route your loop anyways.

Fitting wise I used the following:

  • EK-Quantum Torque 6-Pack HDC 12 - Black (Used about 3 packs)

  • EK-Quantum Torque Color Ring 10-Pack HDC 12 - Satin Gold (Just the accent rings to add to the fittings)

  • EK-Quantum Torque Double Rotary Offset 21 - Black (One used below the GPU to align the tubing with the pass through on the PSU shroud)

  • EK-Quantum Torque Pass-Through G1/4 - Black (Also used some older EKWB pass throughs as they are slightly more compact than the quantum ones)

  • EK-Quantum Torque Plug - Black (Also used some minis in hard to reach places)

  • EK-Quantum Torque Micro Rotary 90ยฐ - Black (Used a lot of those. There's not much room in the North so those save a lot of space)

  • EK-Quantum Torque Extender Static MF 14 - Black (I used various rotary&static extenders around the res)

  • EK-Quantum Torque Rotary T - Black (T piece used for adding a fill / drain port to the res)

That's about the most important parts I used fitting wise. Keep in mind that I also used some older EK stuff I had lying around in certain spaces due to space constraints. Some new quantum torque parts are a bit larger than the older generation.

As for tips:

  • If you wanna build a full custom loop in the North case, you'll have to be ready to make some mechanical modifications to the case, especially If you wanna use the same rads as I did (See picture build log for more info on the modifications). If you are a total beginner on custom loops you might want to choose a bigger case to have more room for your loop without the need for mechanical modifications to the case.

  • Plan your loop carefully before buying any parts. Make sure that the things you wanna mount actually fit in the case you plan to build in. Have a clear idea on where you want the tubes to go, which will also automatically give you a pretty good estimate on how many fittings, angles, etc. you'll need. I usually settle for a case first, then just buy the case to get the measurements right and to get a clear idea on how I wanna route the tubing and where I want to mount all the stuff.

  • Same goes for sleeving. Plan where you want to route the cables to get an idea of how much wiring you'll need to buy. Also it's important to plan how many/which connectors you need for the build, especially on the PSU-side in case you work with a fully modular PSU. For sleeving you need proper tools to get the job done. A proper crimping tool, a wire stripper, lighter or heatgun, special tools to remove the various connectors from their housings (In case you make a mistake or want to use some connectors from your PSU cables).

  • Also if you want to create custom cables for a fully modular PSU bear in mind that the pinout of the PSU is not standardized! (Event different PSU models of the same brand can have wildly different pinouts). In such cases you usually need to examine the wiring of the original cables to know how to wire up your custom cables. Also, never ever connect your custom cables to the hardware and your PSU before you have not made 100% sure that you did the wiring of your custom cables correctly. I usually check this by connecting the cables to the PSU only and then check the voltage output of each pin of the ATX connectors to make sure it conforms to the ATX spec.

For all the basics in custom loops or custom sleeving there's a plethora of useful information on the web. Best to read or watch some basic guides on the topics to get a good idea of what you'll need and how you'll need to do it.

Hope that helps. If you have specific questions about parts of the loop/sleeving in this build I'm happy to answer those too.

dechaun
  • 1 year 2 months ago

Hey man, another question, what is the fitting you put on the top towards the back of the case for? Because I canโ€™t seem to make the logic out of the tube going behind the toprad into the side rad, but then what is that fitting on the top of the case for?

TeyKey1
  • 1 year 1 month ago

The loop basically connects like this (In the direction of water flow):

Pump/Res -> GPU

GPU -> CPU

CPU -> Top Rad

Top Rad -> Front Rad (Top port)

Front Rad (Bottom Port) -> Pump/Res

One thing to notice is that the front rad is a cross-flow rad. So the water goes in at the top and comes out at the bottom, which saves the need to have tubing going from the top of the case to the bottom into the res.

So the tubing behind the top rad (Top right picture number 26) goes into the top rad and not into the front rad.

dechaun
  • 1 year 1 month ago

Thanks man, appreciate it!

Gandalf_theGray8
  • 1 year 2 months ago

This PC has the most beautiful cable management I have ever seen.

Daniel_H212
  • 1 year 1 month ago

The cable management is ๐Ÿ‘Œ๐Ÿ‘Œ๐Ÿ‘Œ

Starznova
  • 1 year 1 month ago

Wow, what a beauty

I just stumbled across your build. Great job.

I gotta tell you, I keep reading the name as Northern Clam. Doh dyslexia.

Gorgeous, great work!

This is how OCD looks like.

Buttertea
  • 8 months ago

How is that RAM. Did you have any issues it being an unsupported 2 x kit of 2?

TeyKey1
  • 8 months ago

Worked out of the box for me with xmp enabled. No problems so far

Buttertea
  • 8 months ago

Thanks! Looks very good. I'll dare try too then.

haydencf3
  • 7 months ago

Am I the only person that thinks the custom cable color scheme ruins the build?

ChaimLichtman
  • 6 months ago

In picture 14 what OS are you using?

TeyKey1
  • 6 months ago

I have a dual boot system with win 11 and pop os. What you see in the pic is the rEFInd boot menu that I use to select the OS to boot up. If you want to achieve the look, it's basically rEFInd with the (slightly customized) ambience theme (https://github.com/lukechilds/refind-ambience) and a custom background image.

crispy.pcpp
  • 4 months ago

Hey, nice build!

I'm looking to water-cool my North as well. How was the radiator fitment for the P360M in the front? How much clearance is there at the top/bottom? And how much of a hassle was it to fit it inside this case? I'm aiming to fit a X360M, which will require some cutting work as well.

TeyKey1
  • 4 months ago

You'll need to make mechanical adjustments to the case to be able to mount such a radiator (as seen in pic 19). In my case, the EK-Quantum Surface P360M X-Flow radiator just about fits in perfectly. It's sitting flush on the bottom of the case and on the top there is a tiny clearance of around 2mm. Additionally, the PSU shroud will get in your way, especially since the x360m is even thicker. So you'll also need to cut there (See Picture 21 bottom right for reference)

Not sure though if you can even get the rad into place, given it's thicker than the one I used. IIRC even with the p360m there was already little room in the case to get it into place.

bentleyTN
  • 4 months ago

IS this a soft-tubed build? Looking to create something similar.

TeyKey1
  • 4 months ago

No, I've used frosted hard-tubing